

Zimbra is a popular email collaboration suite that provides a wide range of features to manage email, calendar, tasks, and more. However, if you want to migrate your Zimbra mailbox to Outlook, you may need to export Zimbra mailbox to Outlook PST format. This article will guide you through the process of exporting your Zimbra mailbox to PST using different methods.
Method 1: Export Zimbra Mailbox to PST using Zimbra Desktop
To manually migrate your Zimbra emails, you can follow 3 steps:
- Step 1: Export and Save Zimbra Emails in EML Format
- Step 2: Migrate EML Files to Outlook
- Step 3: Export Zimbra Emails from Outlook to PST Files
Step 1: Export and Save Zimbra Emails in EML Format
To save your Zimbra mailbox items in EML format, do the following:
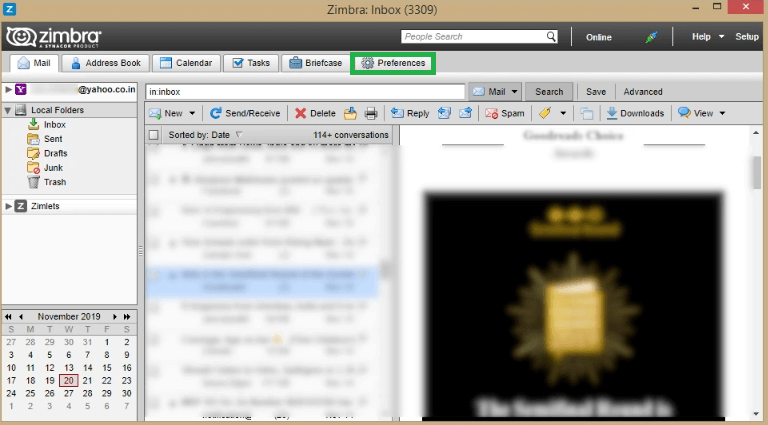
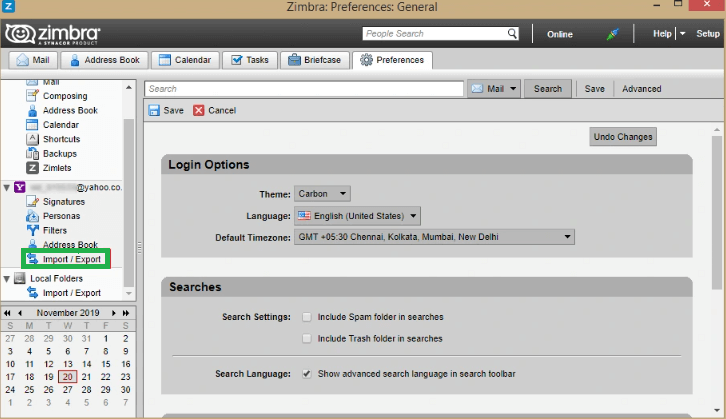
Step 1.1. Launch the Zimbra desktop client and go to the Preferences tab.
Step 1.2. Choose Import/Export from the left pane.
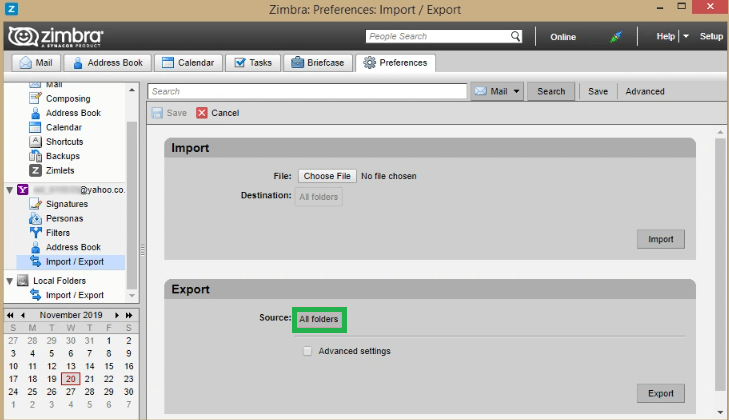
Step 1.3. From the export panel, select All Folders.
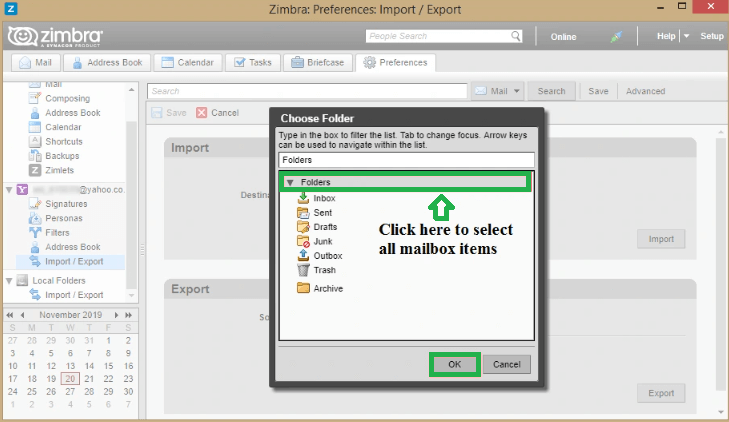
Step 1.4. You can either select individual mailbox items or the whole mailbox. Click OK to proceed.
Step 1.5. Click on Export to start the process.
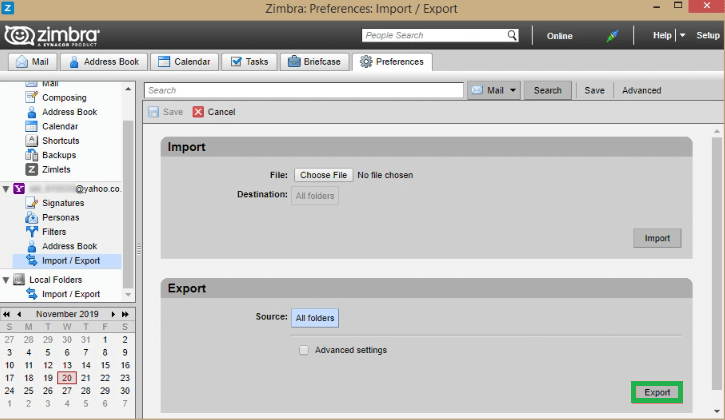
Step 1.6. Provide a destination to save the mailbox items.
Step 1.7. The exported items will be compressed in a ZIP file. Unzip the file using tools like WinZip or WinRAR.
Step 1.8. Check the extension of the unzipped mailbox items. Zimbra currently only allows EML format for exporting mailbox files.
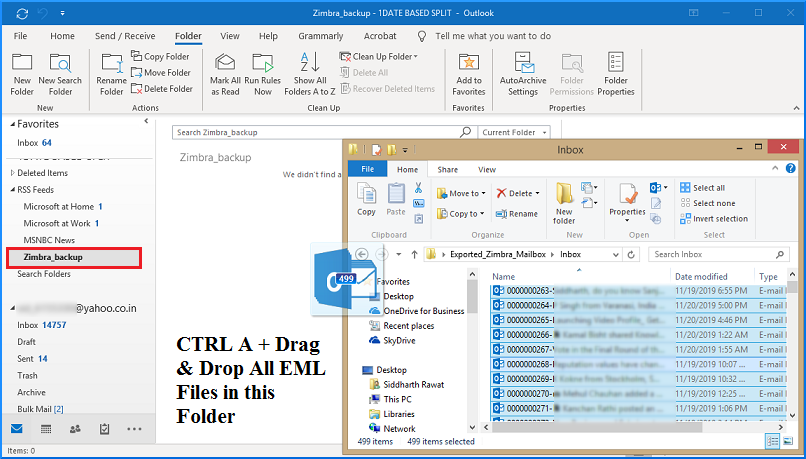
Step 2: Migrate EML Files to Outlook
You can access EML files with your Outlook desktop client by following these steps:
Step 2.1. Open your Outlook desktop client and go to the Folder tab.
Step 2.2. Click on the New Folder tab and provide a new name for the folder.
Step 2.3. Drag and drop all the EML mails into this folder.
Step 3: Export Zimbra Emails from Outlook to PST Files
To export your Zimbra emails from Outlook to PST files, do the following:
3.1. Click on the File tab and select Open & Export from the left pane.
3.2. Click on the Import & Export tab to open the Import and Export Wizard.
3.3. From the list, select Export to a file.
3.4. Select Outlook Data File (.pst) option.
3.5. Select the folder containing the Zimbra backup files.
3.6. Click on the Browse button to save the file to the desired location.
3.7. Check the prior assigned location for the saved PST file.
3.8. Congratulations! You have successfully migrated your Zimbra emails to your Outlook desktop client and exported them to a PST format.
Method 2: Export Zimbra Mailbox to PST using Automated Solution
If you are having all TGZ files on your local system. Then you can easily export Zimbra mailbox to PST in bulk or if you want to migrate your entire Zimbra account to Outlook, you can use SysTools Zimbra Converter Tool.
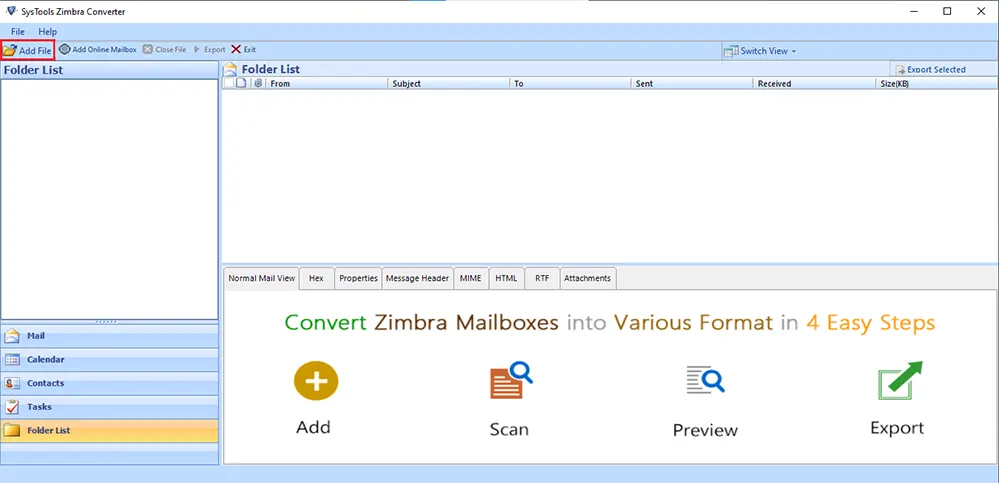
Here’s how you can use the Zimbra Converter tool to export your Zimbra mailbox to PST:
Step 1. Download and install the tool mentioned above on your computer.
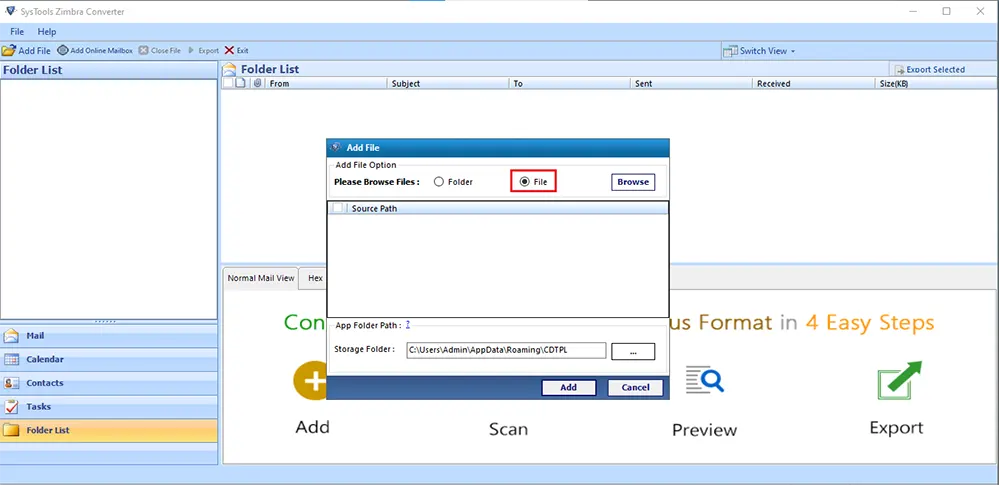
Step 2. Launch the software and click on the “Add File” button to import the Zimbra TGZ file that contains all the data you want to convert.
Step 3. Browse and select the TGZ file from your computer’s storage location.
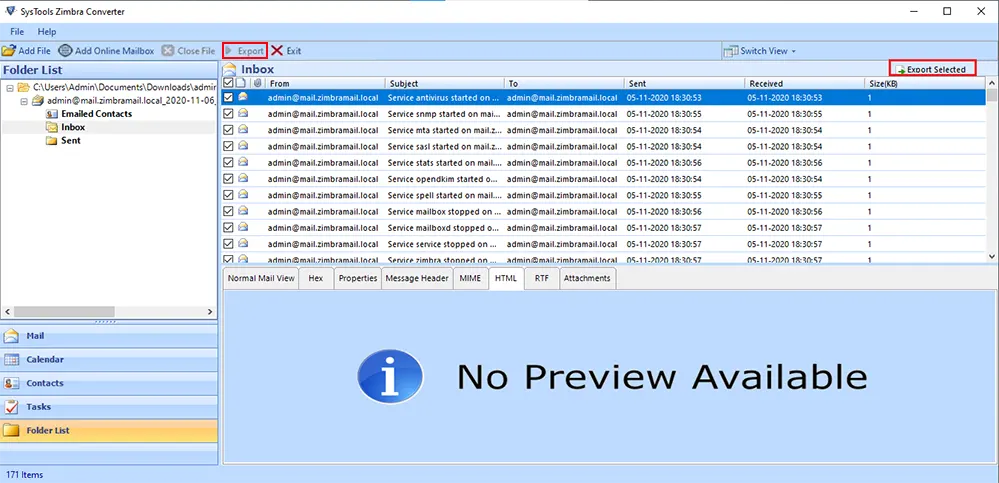
Step 4. Once the file is selected, click on the “Export” button from the top navigation bar.
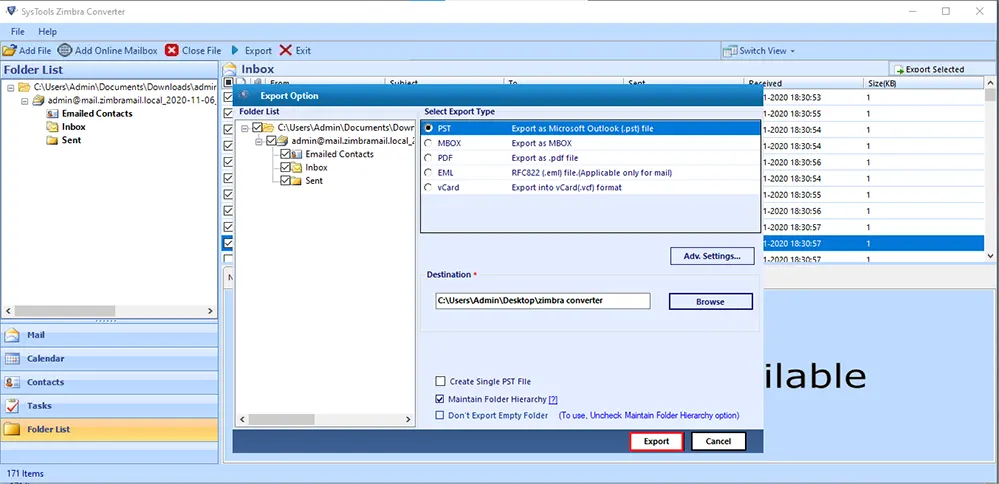
Step 5. Select the “PST” option from the export options and choose the destination location where you want to save the converted Outlook PST file.
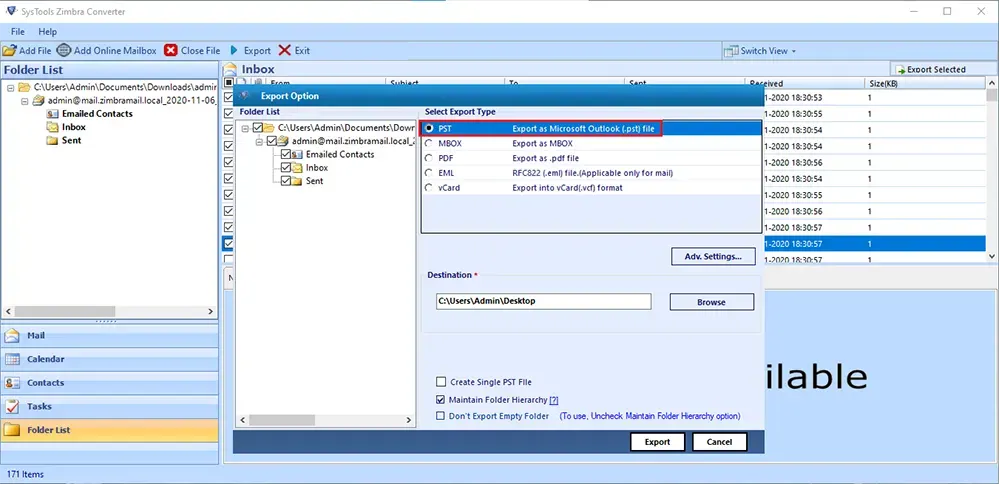
Step 6. If you want to create a single PST file for all the Zimbra data, select the “Single PST” option. If you prefer separate PST files for each Zimbra folder, select the “Multiple PST” option.
Step 7. Click on the “Export” button to start the Zimbra to PST conversion process. This may take some time, depending on the size of your Zimbra data.
Step 8. Once the conversion is complete, the program will display a confirmation message. You can then browse the destination location to find the converted Outlook PST file.
Step 9. To use the PST file in Outlook, open the application and click on the “Import” option from the File menu. Choose the “Import from another program or file” option and select the PST file you just converted. Follow the prompts to complete the import process.
That’s it! You should now be able to access your Zimbra data in Outlook through the converted PST file.
Method 3: Import Mailbox Data Exported from Zimbra Server into Outlook
If you have exported your mailbox from the Zimbra server and want to import it into Outlook, follow these easy steps:
Step 1. Start by extracting the Zimbra server TGZ or ZIP file on your system. This will give you MBOX files, each representing a mailbox folder.
Step 2. Download and install an MBOX Converter Tool on your system.
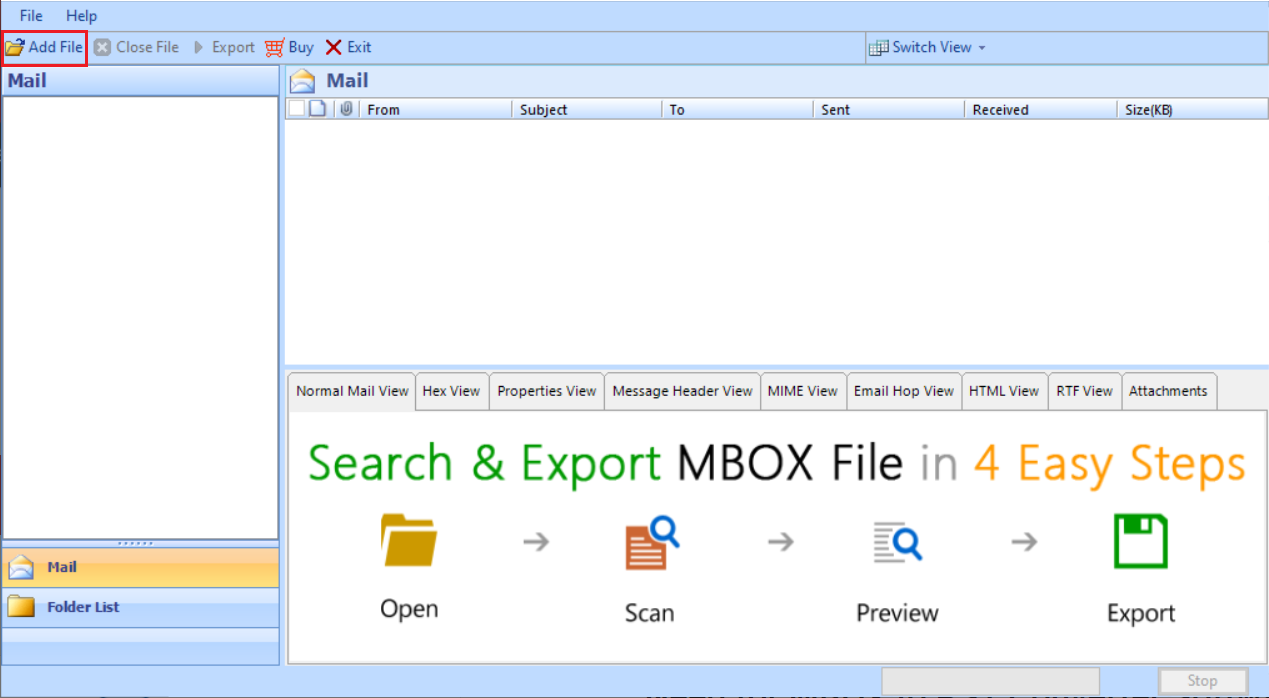
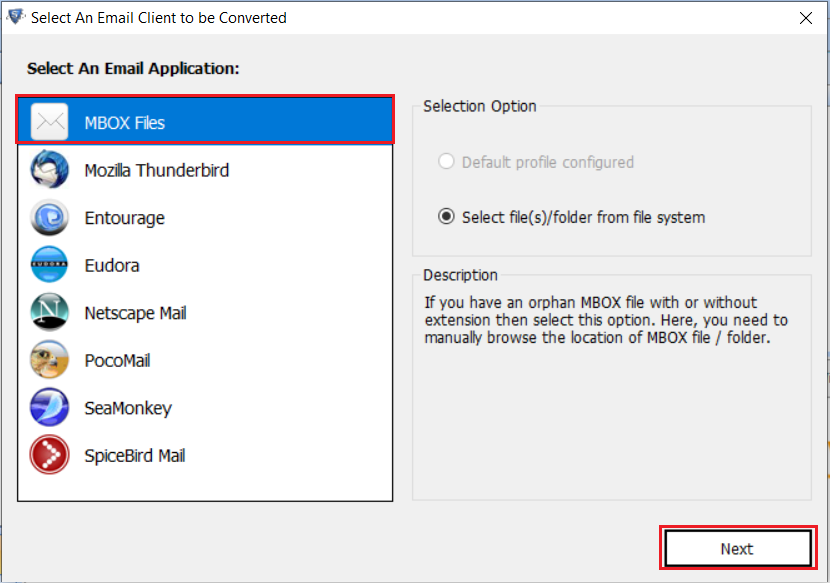
Step 3. Open the wizard and click on the “Add File” button to import the MBOX file.
Step 4. Select the MBOX file and click “Next” to proceed.
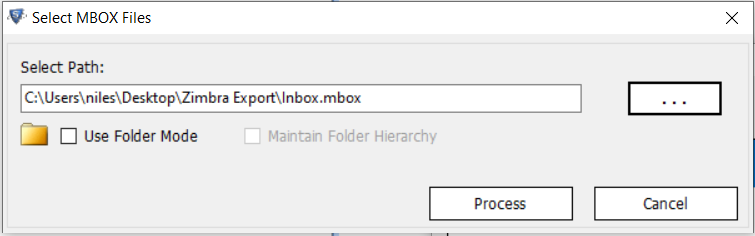
Step 5. Browse and select the Zimbra MBOX file from your system, and then click the “Process” button to initiate the conversion process.
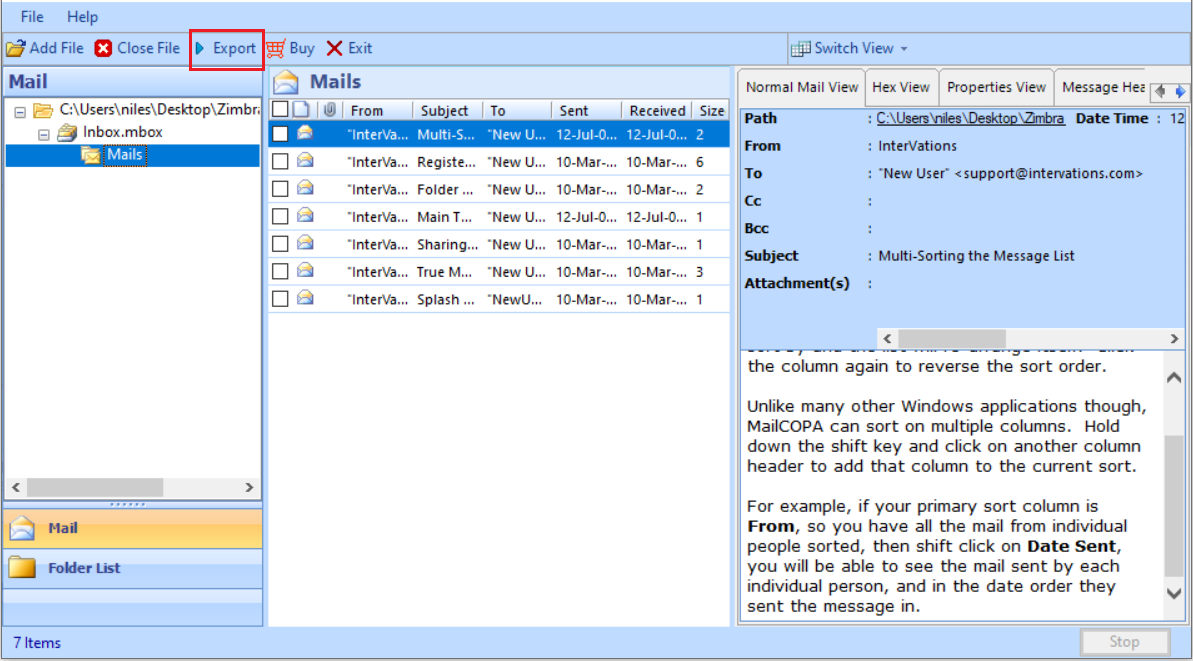
Step 6. Select the mailbox from the left panel to view all its emails in multiple preview panels. Once you’ve reviewed them, click “Export” from the navigation bar to proceed.
Step 7. Select “PST” from the list of export options and click the “Export” button.
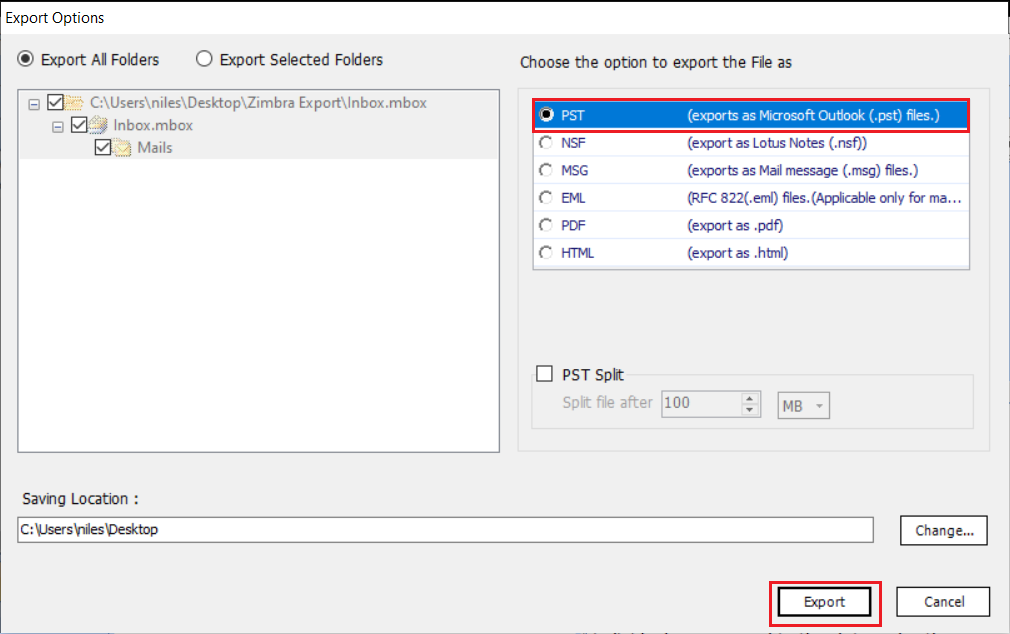
Step 8. The software will begin the process of exporting your Zimbra data to an Outlook PST file.
Step 9. Once the conversion is complete, you will have the PST file ready. You can easily access all its emails by importing it into Outlook.
By following these simple steps, you can easily import your Zimbra mailbox into Outlook and access all your data in one place.
Method 4: Export Zimbra Mailbox to PST using IMAP
If you have enabled IMAP access in your Zimbra account, you can use an IMAP client such as Microsoft Outlook to export your mailbox to PST. Here’s how you can do it:
- Configure your Zimbra account in Microsoft Outlook using the IMAP protocol.
- Create a new PST file in Outlook or select an existing one.
- Select the mailbox or folders that you want to export to PST and drag them to the PST file.
- Wait for the export process to complete.
Conclusion
Exporting your Zimbra mailbox to PST format can be done using different methods. You can use Zimbra Desktop, Zimbra Converter, or an IMAP client to export your mailbox to PST. Each method has its advantages and limitations, so choose the one that suits your requirements. With the help of these methods, you can easily export your Zimbra mailbox to PST and migrate to Outlook without any data loss.