
Office 365 provides ample storage space for your emails, calendar items, and contacts, but sometimes it may not be enough to accommodate all your data. If you have a large number of emails, attachments, or other data, you may run out of space quickly. Fortunately, you can increase the mailbox size limits in Office 365 to accommodate more data.
What is Mailbox Storage Limits in Office 365 By Default?
Mailbox storage limits in Exchange Online refers to the maximum amount of data that a user can store in their email account. Exchange Online is part of Microsoft 365, which is a cloud-based email and collaboration platform for businesses. The mailbox storage limit sets a cap on the amount of data that a user can store in their Exchange Online account, including email messages, attachments, calendar entries, and other information. This limit helps ensure that the performance and reliability of Exchange Online are maintained and that the service is able to scale to meet the needs of organizations of all sizes.
What is the Default Storage Limits Across Microsoft Office 365 & Exchange Plans?
By default, Exchange Online offers a mailbox storage limit of 50 GB per user. This limit can be increased, depending on the needs of the organization and the size of the email accounts. Organizations can choose to increase the storage limit for individual users or for all users, depending on their needs and budget. Users can increase Office 365 mailbox size limits using the Exchange Online administrative portal or through the use of Microsoft PowerShell.
Default Storage Limits Across Microsoft Office 365 Plans
| Office 365 Plans | Mailbox | Archive mailbox |
|---|---|---|
| Microsoft 365 Business Basic | 50 GB | 50 GB |
| Microsoft 365 Business Standard | 50 GB | 50 GB |
| Microsoft 365 Business Premium | 50 GB | 1.5 TB |
| Microsoft 365 Enterprise E3 | 100 GB | 1.5 TB |
| Microsoft 365 Enterprise E5 | 100 GB | 1.5 TB |
| Office 365 Enterprise E1 | 50 GB | 50 GB |
| Office 365 Enterprise E3 | 100 GB | 1.5 TB |
| Office 365 Enterprise E5 | 100 GB | 1.5 TB |
| Office 365 Enterprise F3 | 2 GB | Not available |
Default Storage Limits in Standalone Plans
| Standalone Plans | Mailbox | Archive mailbox |
|---|---|---|
| Exchange Server | 2 GB | 100 GB |
| Exchange Online Plan 1 | 50 GB | 50 GB |
| Exchange Online Plan 2 | 100 GB | 1.5 TB |
| Exchange Online Kiosk | 2 GB | Not available |
Office 365 Mailbox Size Limits Reached – What Happens Next?
There are generally three limits, set according to the mailbox storage quotas, these are as follows:
- Warning Limit: The warning limit is the first threshold that a user reaches as they approach the maximum storage capacity for their mailbox. When this limit is reached, the user will receive a notification warning them that their mailbox is getting full and they should start deleting some emails or move them to an external storage location. The purpose of this limit is to give users a heads up to prevent their mailbox from reaching its maximum capacity and impacting their ability to send and receive emails.
- Send Limit: The send limit is the threshold where the user will no longer be able to send emails until they reduce the size of their mailbox. When this limit is reached, the user will receive an error message indicating that they have exceeded their mailbox storage quota and cannot send any more emails until they reduce their mailbox size. This limit is set to ensure that the email system remains stable and does not become overwhelmed with large amounts of data.
- Send/Receive Limit: The send/receive limit is the maximum storage capacity for a user’s mailbox. When this limit is reached, the user will no longer be able to send or receive emails until they reduce the size of their mailbox. This limit is set to prevent the email system from becoming overwhelmed with data, and to ensure that all users have access to their email. If a user reaches this limit, they will receive an error message indicating that their mailbox is full and they need to delete some emails or move them to an external storage location.
These limits are set to help manage the storage space and ensure the stability and performance of the email system. They can be adjusted according to the needs of the organization and the amount of data being stored in email accounts.
Also Read: Office 365 Ransomware Protection & Recovery: A Complete Step By Step Guide
How to Increase the Office 365 Mailbox Size Limit Using Different Approaches?
There few ways that you can use to increase Office 365 mailbox size. There are as follows:
- Determine Your Current Mailbox Size Limits: Before you can increase your mailbox size limits, you need to determine your current limits. To do this, log into your Office 365 account and go to the Exchange Admin Center. From there, click on “Recipients” and then “Mailboxes.” You will be able to see your current mailbox size limit for each user.
- Choose a Plan that Offers Larger Mailbox Size Limits: There are different plans available in Office 365, and some of them offer larger mailbox size limits than others. If you need more storage space, you will need to upgrade your plan. You can upgrade your plan by logging into your Office 365 account, going to the Office 365 admin center, and clicking on “Billing.” From there, you will be able to upgrade to a plan that offers larger mailbox size limits.
- Increase the Mailbox Size Limit for an Individual User: To increase the mailbox size limit for an individual user, go to the Exchange Admin Center and click on “Recipients” and then “Mailboxes.” Find the user whose mailbox size limit you want to increase and click on their name. From there, you will be able to change their mailbox size limit.
- Increase the Mailbox Size Limit for Multiple Users: To increase the mailbox size limit for multiple users, go to the Exchange Admin Center and click on “Recipients” and then “Mailboxes.” From there, you will be able to select multiple users and increase their mailbox size limit at once.
- Monitor Mailbox Size: After increasing your mailbox size limit, it’s important to monitor your mailbox size to make sure you don’t run out of space again. To monitor your mailbox size, go to the Exchange Admin Center, click on “Recipients,” and then “Mailboxes.” From there, you will be able to see the current size of each mailbox.
- Move data to OneDrive or SharePoint: Users can move large attachments, files, or email folders to OneDrive or SharePoint, which are cloud storage solutions provided by Microsoft. This will free up space in their mailbox and make it easier to access and share their files.
- Archive old or infrequently accessed emails: Users can create an archive mailbox to store old or infrequently accessed emails. This will help reduce the size of their primary mailbox and make it easier to access their important emails.
- Delete unnecessary emails: Users can delete emails that they no longer need, such as old newsletters, spam, or duplicate emails. This will free up space in their mailbox and improve its performance.
- Implement Retention Policies: Administrators can implement retention policies to automatically delete emails that are older than a certain number of days. This will help users manage the size of their mailbox and ensure that they are only keeping the emails that are important to them.
Must Read: Step-by-Step Guide to Migrate OneDrive for Business to Another Tenant
These methods can be used to increase the size of an Office 365 mailbox, improve its performance, and ensure that users have access to the data they need.
How to Increase Office 365 Mailbox Size Limit Using PowerShell?
While you can check the mailbox size in the web interface, you can increase Office 365 mailbox size only in PowerShell. Before doing so, you need to run Windows PowerShell as an administrator:
Step 1. Click Start, type cmd, right-click the cmd shortcut, and in the context menu, click Run as Administrator.
Step 2. Connect to Exchange Online PowerShell. This step is required to use cmdlets for managing Exchange Online.
Step 3. Use this command to open a dialog window and enter the credentials of your Office 365 administrator account:
$UserCredential = Get-Credential
Note: The entered credentials are saved in a variable.
Step 4. Create a new Exchange Online session by using the credentials entered earlier:
$Session = New-PSSession -ConfigurationName Microsoft.Exchange -ConnectionUri https://outlook.office365.com/powershell-liveid/ -Credential $UserCredential -Authentication Basic -AllowRedirection
Import-PSSession $Session -DisableNameChecking
Step 5. Now you can check the mailbox quota for a user by running the following command:
Get-Mailbox <User ID> | Select *quota
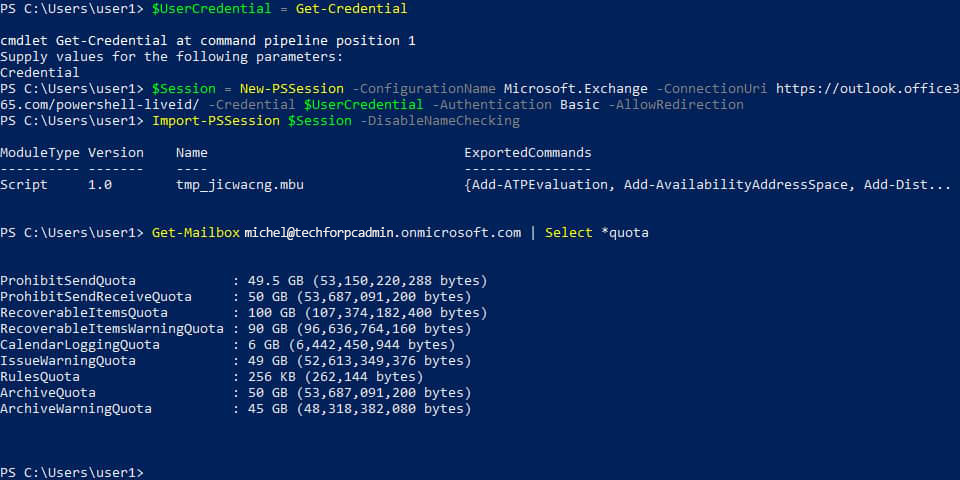
Checking Office 365 mailbox size quotas for a user in PowerShell
Step 6. At this step, you can run the command to increase Office 365 mailbox size limits:
Set-Mailbox <UserID> -ProhibitSendQuota <Value> -ProhibitSendReceiveQuota <Value> -IssueWarningQuota <Value>
Where:
- ProhibitSendQuota, ProhibitSendReceiveQuota and IssueWarningQuota are the appropriate storage quotas for the Office 365 mailbox. The ProhibitSendQuota value must be less or equal to the value of the ProhibitSendReceiveQuota. The IssueWarningQuota must be less or equal to the value of the ProhibitSendQuota.
- <UserID> is the email address of the Office 365 user, user principal name or globally unique identifier (GUID).
- <Value> is the amount of storage in gigabytes, megabytes or kilobytes (GB, MB, or KB).
You can set a lower value for the IssueWarningQuota to notify a user in time about the ending of free mailbox storage space.
In this example, the below command is used:
Set-Mailbox micheljohnson@techforpcadmin.onmicrosoft.com -ProhibitSendQuota 98GB -ProhibitSendReceiveQuota 99GB -IssueWarningQuota 97GB
Note: This command works only if the license (subscription plan) supports extending the mailbox size.
What are the Benefits of Increasing Office 365 Mailbox Size Limits?
There are several benefits to increasing the mailbox size limits in Microsoft Office 365, including:
- Increased Storage: By increasing the mailbox size limit, users can store more data in their email account, reducing the need to store information in other places or to regularly clean up their mailbox to free up space.
- Improved Productivity: Larger mailbox size limits can help users be more productive, as they can keep all the information they need in one place and don’t have to spend time searching for emails that may have been deleted to free up space.
- Better Data Management: With increased storage capacity, users can more effectively manage their email data and retain important information for longer periods of time.
- Enhanced Collaboration: When mailbox size limits are increased, users are able to send and receive larger attachments, making it easier to collaborate with others and share information.
- Better Compliance: In regulated industries, it may be necessary to retain email data for long periods of time. By increasing the mailbox size limits, organizations can ensure that they are able to meet their compliance requirements.
In short, increasing the mailbox size limits in Office 365 can lead to improved user productivity, better data management, and enhanced collaboration, making it a valuable investment for organizations of all sizes.
Best Way to Increase Office 365 Mailbox Size Limits up to 100GB
The easiest method to increase the mailbox size for Office 365 is to delete unwanted items from your account. This can include documents, emails, and other items that you no longer need. However, before deleting any data, it is recommended that you create a local copy of your mailbox data on your computer for future use.
Backing up your data is essential to protect it against any ransomware attacks or accidental deletion. It also ensures that you can always access your data, even during server downtimes. Microsoft does not take responsibility for protecting your data, so it is up to you to secure it.
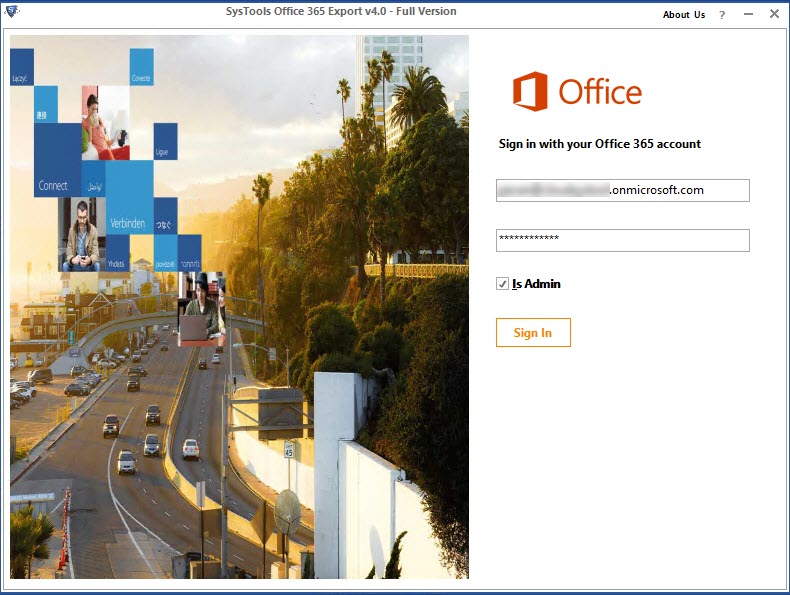
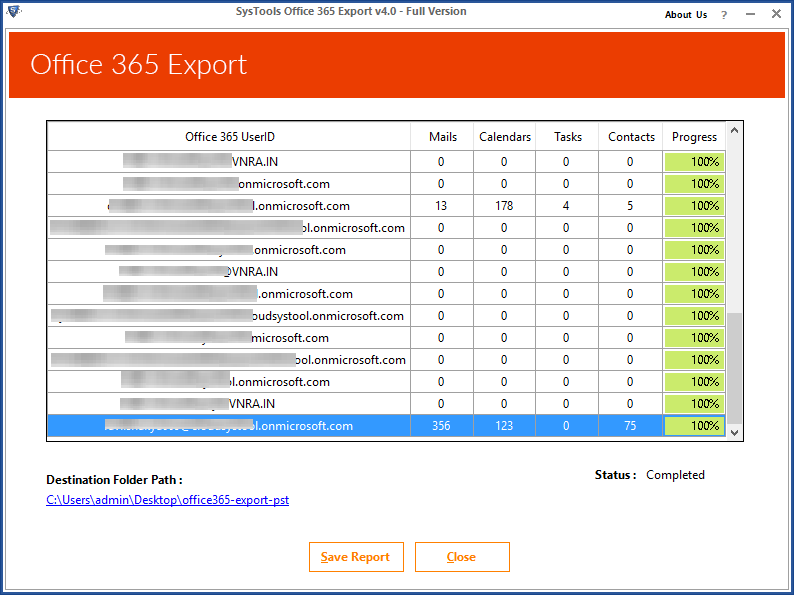
Fortunately, there are tools available to help you backup your Office 365 data. The SysTools Office 365 Export Tool is a popular software used by many businesses to secure their data. This tool allows you to backup and restore data from your Office 365 account as needed.
Once you have created a backup of your crucial data, you can use PowerShell commands to fix the Office 365 mailbox size exceeded error. With these commands, you can adjust the mailbox size limits to meet your needs. By combining the deletion of unwanted data with regular backups and PowerShell commands, you can easily manage your Office 365 mailbox size and ensure that your data is always secure.
Quick Steps to Increase Office 365 Mailbox Size Limits up to 100 GB
Step 1. Download, install and run the software on your computer. Use Admin/user credentials to log in to the software.
Step 2. Select the file format from PST, MSG or EML. Choose the required mailbox items to export from the given options.
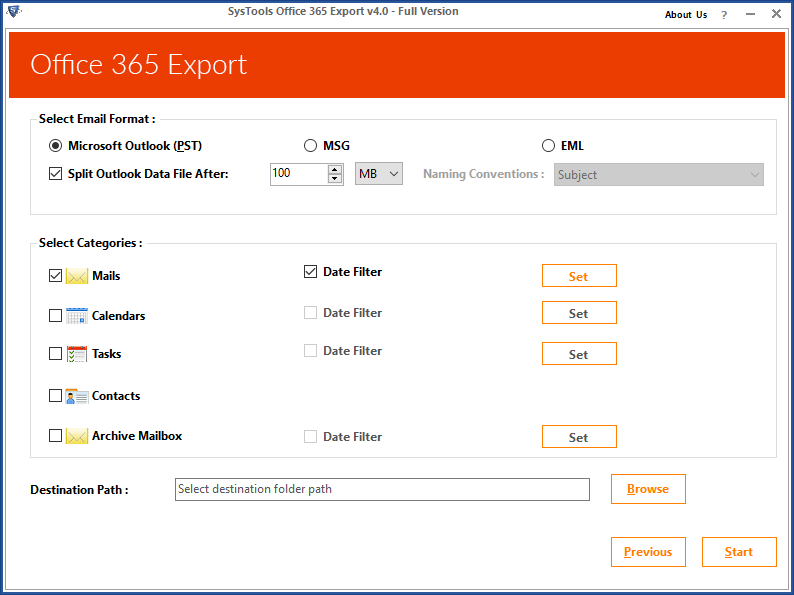
Step 3. Apply date filters for selective data backup. and define the destination location to save the files in local file format.
Step 4. Now, choose the required user from the given list and click on the start button.
Conclusion
By following these steps, you can increase the mailbox size limits in Office 365 and accommodate more data. This will help you ensure that you have enough storage space for all your emails, calendar items, and contacts. Moreover, it’s important to monitor your mailbox size regularly to ensure that you have enough space, and to make any necessary changes to your plan if necessary.